Deploy Rails (production) on your own server
Intro
I wanted to deploy a small rails application in my own server and I found the material available a little bit puzzling. After spending lots of time with different tutorials and being an advocate of writing things that I would like to read, decided to roll my own tutorial/post.
The tutorial ends once we can see the rails application deployed on a plain vanilla Ubuntu server, assuming that the process is similar to Debian boxes. Also this document does not include ongoing update of the application, so will not fiddle with how to retrieve the application from Github and restart it or any deployment framework such as Dokku or Capistrano. When this bridge is crossed, it will be part of an “extra material” section.
A note on other tutorials
Most tutorials I have seen follow a linear path, while some of the steps can be executed in parallel. Also many say what to do but do not explain that much why you do it. This makes sense as someone could fall into the rabbit hole of explaining how a web server works for hours and hours - pages and pages in our case. I will try to provide a short paragraph or at least one link in each of these cases.
Most influential post for writing this
Sophie De Benedetto’s Deploying Rails to DigitalOcean, the Hard Way.
There are many posts lying around but following this one I managed to complete the installation. See References section for more.
The stack
Rails version 5.0 with PostgreSQL running on Nginx with Phusion Passenger.
Why get into deployment in the first place
Or why deploy in a world where Heroku exists? Did some digging and self reflection before deciding to do a roll-your-own deployment. The answer is the usual in IT circles “it depends” mixed with “what you want”. I think Heroku is a great option not only because you can deploy in minutes, but also because it eliminates the need for a hiring a systems administrator in some cases - there are companies that pay hundreds of dollars per month to Heroku instead of hiring a person to look after their systems. There will be the case where their platform is down and nobody can do anything, which is though as probable an another provider of choice going down without including possible human errors on client’s behalf.
Heroku has two issues: costs scale exponentially (“their” fault), and there is no viable industry alternative (not “their” fault). For small/hobby projects I would suggest to have a budget: Say to yourself that after an arbitrary 15$/month threshold you will roll your own, choosing one of the VMs from Amazon, Digital Ocean, Google Cloud, Azure, or something more niche.
For my project I wanted to run some custom services (not covered here), so sooner or later there would be the need to have a Linux box somewhere. I would also consolidate some other stuff in that machine, also would like some extra control and the know-how.
Prerequisites
A running application in a development environment. Because the connection to the database needs to be checked, make sure that there are some data there. Maybe create a model and some seed data, or integrate Devise. This for the case that there is not an existing application already.
Because there is no git deployment, create a copy with the following command,
assuming that the application resides in a folder named web:
tar --exclude=".git" --exclude="tmp" -cvzf webapp.tgz web/*
Alternatively I have seen that some authors create a rails application on the spot which should be all right as long as there is some database connectivity. One of those tutorials is this from digital ocean: [https://www.digitalocean.com/community/tutorials/how-to-deploy-a-rails-app-with-puma-and-nginx-on-ubuntu-14-04], which was a little bit confusing, since it was difficult to understand which step was related to deployment and which to application development.
Assumptions
Shell: I usually work with fish but the plain vanilla is bash, so bash will be used for everything on production machines.
Application Server: Mostly for being a good default and quite standard.
General approach: Big bang deployment. In theory we could test each step in isolation and then integrate. I tried to do that to some extend, but I rather slided towards a Big Bang deployment which from my university years is a term for: throw in everything, if it doesn’t work fix what’s broken on the spot and try again”.
Deployment
Steps
The steps are the following:
- Create/Rent/Lease a server
- Connect to server with SSH (depends on 1)
- Install Ruby with rbenv and ruby-build (depends on 2)
- Install Rails and NodeJS (depends on 3)
- Install NGINX (depends on 2)
- Copy Rails application to server, bundle, and precompile assets (depends on 2)
- Install and configure PostgreSQL (depends on 1)
- Install and configure Phusion Passenger for your application/environment (depends on 4, 5, 6)
- Connect to application from browser, see login page (depends on 7, 8)
1. Create/Rent/Lease a server
There are many options here that start with leasing a machine somewhere or starting with a virtual machine at the development PC. The easiest way is if there is a spare computer anywhere to install Ubuntu or distribution of choice and experiment on that. I would feel more comfortable to do a deployment once or twice in a controlled local environment and then to the final production server. The local environment can be used then for experimentation or decommissioned. I really enjoyed using vagrant so deployed an docker instance of an Ubuntu VM which is available here: https://gist.github.com/dimitrismistriotis/2aebe16bf713c40aaf98cee6fc8d4fa6#file-vagrantfile. VirtualBox could also be used but I already develop using docker plus I do not want any Oracle software running on my computers.
So copy the file to a new directory along with the webapp.tgz produced in the
prerequisites, and then a vagrant up starts the machine. Remember after each
session to vagrant halt to stop it. The current box exposes guest’s port 80
(the HTTP port) to host’s 4567, so in order to access the application later on
we will navigate to http://localhost:4567/.
Vangrant from HashiCorp: Create and configure lightweight, reproducible, and portable development environments. With Vagrant you can: Create a single file for your project to describe the type of machine you want, the software that needs to be installed, and the way you want to access the machine. Store this file with your project code., then: Run a single command — “vagrant up” — and sit back as Vagrant puts together your complete development environment. Say goodbye to the “works on my machine” excuse as Vagrant creates identical development environments for everyone on your team. I installed Vagrant from it’s download page: https://www.vagrantup.com/downloads.html
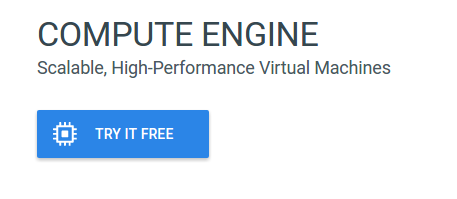
Google Cloud Engine (1st choice)
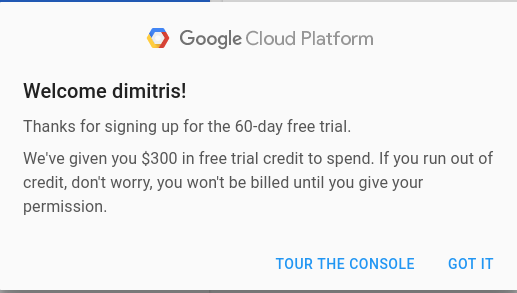
When decided to deploy on a cloud server, I chose purely on the basis on being interested to explore their stack, plus positive bias towards the company, Google’s Compute Engine. There is a free option, while at the time of writing having a hobby project is not exactly something that goes by the rules, as you need to be a business in order to register. Current word on the street is that this will change it soon at least for the United Kingdom. That’s the current situation with the non-US part of the world. There is also a “Sign up and get $300 to spend over the next 60 days” incentive.
It starts here:
Also good to know:
There is a tutorial and the server instance needs to be associated with what is defined as a “project”. Being hard to choose names, and currently reading Jodorowsky’s Metabarons, I just named the project “castaka138”, since a number is also required to be present in the name.
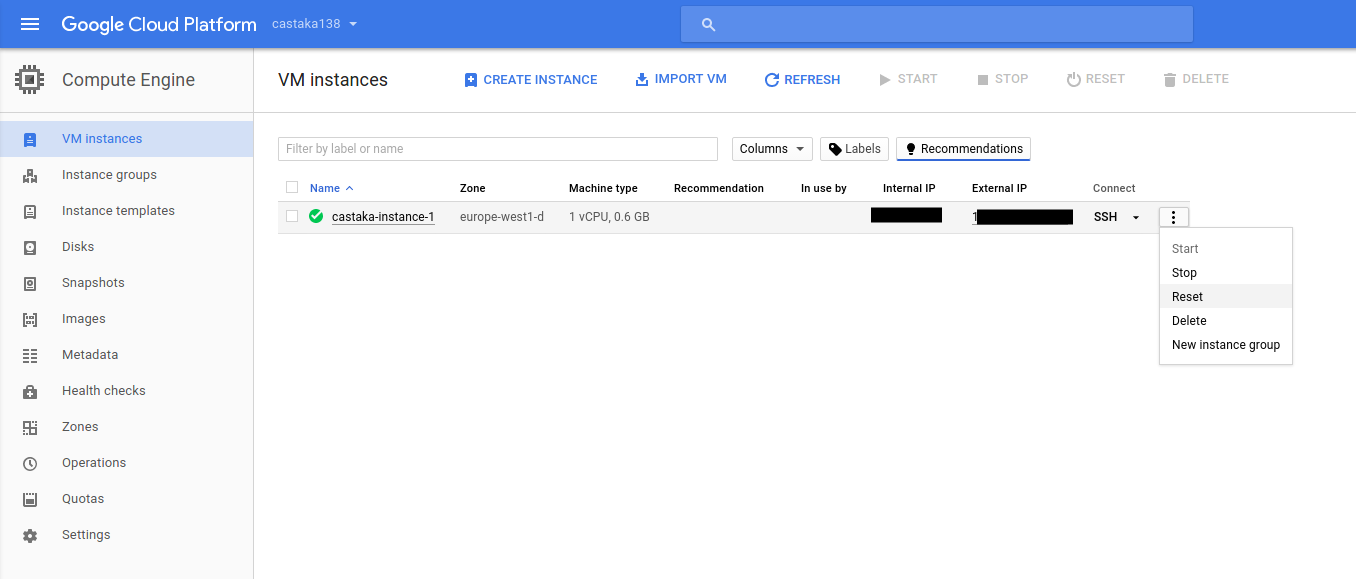
Then after navigating to “Compute Engine” and some initialisation period which may vary, there are four steps:
- Click the Create instance button
- Select a Boot disk image
- Allow HTTP traffic
- Click the Create button
In theory some of the above can be conducted from the command line with a
gcloud command. Me being a newbie, decided to go through web at least until I
cut my teeth a little bit more.
There I named the instance “castaka-instance-1” (or prefixed project’s name with
a dash to default “instance-1”). Then chose the cheapest combination,
“Shared CPU” with “0.6 GB” of memory, and a proud “Ubuntu 16.04” disk image. On
the “Firewall” section, both HTTP and HTTPS were chosen as there is the
intention to experiment with these. For connection via SSH, I added one of my
current SSH keys, with the intention to change it later (see next section,
step 2). I added them as “Project wide SSH keys”, so the project has now one
SSH key. I assume for this tutorial adding them as a specific key to this
machine would be OK.
Note: The networking options puzzled me a bit, might need to troubleshoot and get back here to revise.
Once this step is over, the external IP of that machine will be available. Now you can connect through SSH.
For the rest of the tutorial each step will be described as it was conducted on the local VM and then the differences if any for the GCE instance will follow.
Hetzner (hetzner.cloud)
Decided to use Hetzner once I found out that my application could be hosted in a signle machine with them offering a good price for a very powerful box.
2. Connect to server with SSH
For Vagrant this is easy: after going to the directory where vagrant was run, a
vagrant ssh is enough.
For remote servers, everybody agrees on creating a pair of SSH keys and then use these to connect disabling password login for that user and root login altogether.
While most posts suggest the same commands for generating the private/public pair for ssh login, after reading Gert van Dijk’s Upgrade your SSHkeys!, I would suggest:
ssh-keygen -o -a 100 -t ed25519
or follow as much of the advice of https://stribika.github.io/2015/01/04/secure-secure-shell.html as possible moreover because having a new box without any need to support legacy produced keys.
The default installation might not have a text editor included. Since this post
does mostly small changes or copy-pastes, nano should be enough so
sudo apt-get install -y nano. You might be a vim or emacs wizard instead. In
either case you might want to install and configure an editor now.
If you are following the Google Compute Engine deployment path, then in order to automate the whole process, the next should be appended to the “~/.ssh/config” file:
Host castaka138 # Or any name you want
        Hostname XXX.XXX.XXX.XXX # External IP address of the instance
        PreferredAuthentications publickey
        IdentityFile ~/.ssh/id_ed25519
        IdentitiesOnly yes
Also available here: https://gist.github.com/dimitrismistriotis/2aebe16bf713c40aaf98cee6fc8d4fa6#file-dot-ssh-config
Then you can connect either from the command line with: ssh castaka138 or
what is after the “Host” directive in the configuration file. You can provide
the username, IP, and identity file in a long command which is what the
documentation explains how to do. In either case at the end a bash command
prompt should be greet you.
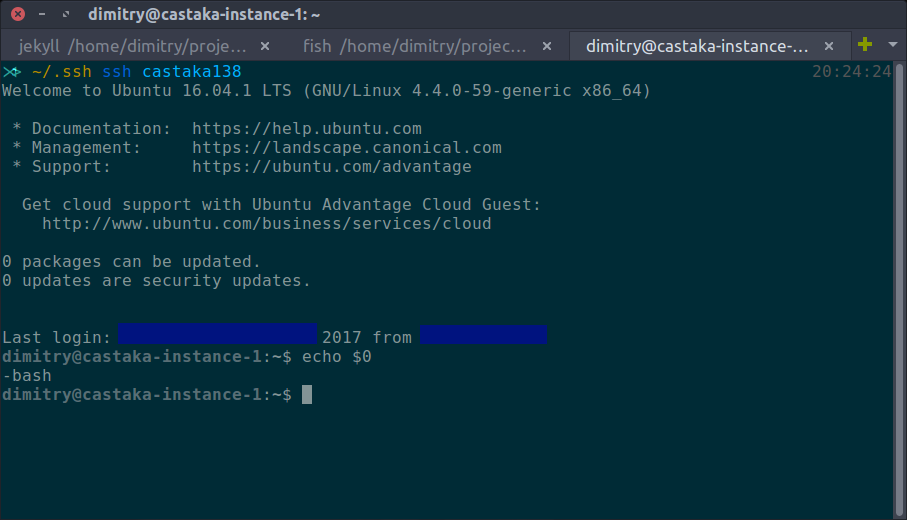
The machine seems to have some software installed, so there was vim, pico, and nano. The editor of choice remains nano for this post’s purposes.
Notes: (1) GCE setup was different than the ones usually encountered in the
past which usually started from a user able to sudo from a web console or
something similar. In case such a provider was chosen these should be the next
steps from the top of my head: a. Disable root login on remote host, b. copy
public key to remote host, c. test connection, d. block password login on remote
host, e. create a “config” file on local host similar to the one above
Create user, add to sudoers and disable root login
This for the Hetzner box (or any other plain one) as Google Cloud had taken care of it.
Create “username”, authorized_keys file with public key
chown <username>: authorized_keys
chown -R <username>: /home/<username>

sudo chmod 0700 /home/<username>/.ssh/
sudo chmod 0600 /home/<username>/.ssh/authorized_keys

sudo adduser <username> sudo
sudo sh -c "echo '<username> ALL=NOPASSWD: ALL' >> /etc/sudoers"
Once all done, disallow root ssh. To “/etc/ssh/sshd_config”:
PermitRootLogin no
then as root:
service ssh reload
(2) It might be useful to know some of the SSH internals. For me it was the so called snail book, SSH: The Secure Shell The Definitive Guide. Unfortunately there is not much printed material available as the book’s latest edition was published in
- I guess now people are only looking online to start.
Congratulations! By “unlocking challenge 2” you can connect to the production server. The next steps can be executed sequentially, in parallel or in a different order as described above in the “Steps” section.
Before next step execute sudo apt-get update and sudo apt-get upgrade.
Locale

Many commands run later on depend on Perl which will always complain about locale:
perl: warning: Setting locale failed. perl: warning: Please check that your locale settings: LANGUAGE = (unset), LC_ALL = (unset), LANG = “en_GB.UTF-8” are supported and installed on your system. perl: warning: Falling back to the standard locale (“C”).
This can be fixed by running sudo dpkg-reconfigure locales and setting up the
system locale, which is something you might wanted to do anyway.
3. Install Ruby with rbenv and ruby-build
![]()
There is a nice post here:
http://kgrz.io/Programmers-guide-to-choosing-ruby-version-manager.html on
choosing a version manager for Ruby. I decided on this combination based on
popularity plus I saw an easier-to understand integration with Passenger on the
tutorials that this post has stolen from is based on.
Generally reflecting on writing this, the decision was to have a as boring server as humanly possible, hence easy to debug. So opting for the most popular choices is at least desired. For not choosing RVM, changing how cd works is something that this geek’s heart cannot endure, provided with an alternative.
sudo apt-get install -y git-core curl zlib1g-dev build-essential \
  libssl-dev libreadline-dev libyaml-dev libsqlite3-dev sqlite3 \
  libxml2-dev libxslt1-dev libcurl4-openssl-dev \
  python-software-properties libffi-dev
All these are unfortunately needed for rbenv, ruby installation and some gems. Unfortunately because more packages progressively bloat the system with probable security and maintenance implications.
For rbenv:
cd ~
git clone git://github.com/sstephenson/rbenv.git .rbenv
echo 'export PATH="$HOME/.rbenv/bin:$PATH"' >> ~/.bash_profile
echo 'eval "$(rbenv init -)"' >> ~/.bash_profile
source ~/.bash_profile
(Source: Digital Ocean’s tutorial and rbenv’s installation instructions with some modifications) Then:
cd ~
git clone git://github.com/sstephenson/ruby-build.git ~/.rbenv/plugins/ruby-build
echo 'export PATH="$HOME/.rbenv/plugins/ruby-build/bin:$PATH"' >> ~/.bash_profile
source ~/.bash_profile
And time to get our preferred version of Ruby (this was the one that the project to be deployed was using at the time):
rbenv install -v 2.3.1
rbenv global 2.3.1
A ruby -v should return something in the lines of:
“ruby 2.3.1p112 (2016-04-26 revision 54768) [x86_64-linux]”
A question at that point would be what to do if the production instance comes with the desired Ruby version installed. My take would be to still go through the Rbenv/Ruby-build path since the production Ruby and the system Ruby are two different things, which might need to be updated/upgraded separately. For the GCE instance specifically, there was no Ruby at all. An interesting fact is that while downloading stuff from the Internet, such as cloning Git repositories, is ultra-fast specially compared to my local VM. Compiling, as I chose a shared CPU being cost concious, was considerably slower than in the local VM. A good idea would be to increase the CPU speed while compiling and then lower it down once things have settled. My lazy self did not allow me to utilise this approach.
4. Install Rails and NodeJS
![]()
A nice idea that usually gets forgotten is to run at this point:
echo "gem: --no-document" > ~/.gemrc. Documentation is not that much needed
in a production server and removing it out will speed up the gem
installation/update process.
For Rails installation:
gem install bundler && rbenv rehash
gem install rails && rbenv rehash
The “rehash” command of brenv, “Installs shims for all Ruby executables known to rbenv (i.e., ~/.rbenv/versions//bin/). Run this command after you install a new version of Ruby, or install a gem that provides commands …” according to tool’s documentation. In order to be sure that this happens all the time, the command should be appended to a future deployment script.

In any case once everything is over, check with rails -v to see that Rails has
been properly installed.
We can verify that everything is all right by creating a new Rails application and running it:
cd ~
rails new testit
cd testit
rails s
Which brings up an error: “There was an error while trying to load the gem
‘uglifier’. (Bundler::GemRequireError) Gem Load Error is: Could not find a
JavaScript runtime. See https://github.com/rails/execjs for a list of available
runtimes.” This can be fixed by installing the missing piece of this step,
NodeJS: sudo apt-get install -y nodejs. I am not 100% sure but even if Ubuntu or
Debian have a more legacy version of Node, it should be OK for Rails. There are
also different options for a JavaScript runtime but chose not to explore them.
Do not know if it would be better to be able to do this processing in a different machine to the one we want to deploy, keeping the production machine with minimal packages installed. In any case this is the way things currently are…
5. Install NGINX

Installing Nginx with defaults should be easy
sudo apt-get install -y nginx
then
sudo service nginx start
For some reason (probably something to do with how docker comprehends the
world), running daemons (in our case nginx and postgresql) did not persist
between runs of the machine or reboots. That’s why I used this little script
named “start_services” after every vagrant ssh:
#!/bin/sh
sudo service postgresql start
sudo service nginx start
Available here: https://gist.github.com/dimitrismistriotis/2aebe16bf713c40aaf98cee6fc8d4fa6#file-start_services. Do not
forget to make it executable (chmod +x start_services).
For the GCE instance, check that everything is all right by rebooting (“Reset”) the machine.
6. Copy Rails application to server, bundle, and precompile assets
In the case of using Vagrant the “webapp.tgz” file created should be first
copied to the shared directory of the host machine extracted from the the
current user inside the container: tar -xvzf /vagrant_data/webapp.tgz. Target
application is in the “web” directory, which from now on will be:
“/home/vagrant/web”.
Note: When deploying on an actual machine .tgz should be copied there before extraction thought secure copy if this way is followed. Probably most will do a git clone, which as discussed before is out of this post’s main body, in the appendixes section.
Then bundle. It will complain about the pg gem for Postgresql connectivity.
This is fixed by: sudo apt-get install -y libpq-dev and then bundle again. As
always followed by an rvn rehash
We can see that there is some life by running a console (rails c), or even a
production console(RAILS_ENV=production rails c). Just do not try to use the
database, because nothing is there yet or it has not been configured. Trigger
an error if curious by trying: User.all.
I also had not configured Devise’s secret key which raised an error as well. Remember to fix the application first if that is the case and then copy it again (This is where using git would be handy). For the record the error message was the following:
rails aborted!
Devise.secret_key was not set. Please add the following to your Devise initializer:

  config.secret_key = '▓▓▓▓▓▓▓▓▓▓▓▓▓▓▓▓▓▓▓▓▓▓▓▓▓▓▓▓▓▓▓▓▓▓▓▓▓▓▓▓▓▓'
Although this could be done later, lets precompile application’s assets while still in this step so that they will be ready later on:
RAILS_ENV=production rails assets:precompile
7. Install and configure PostgreSQL
![]()
Traditionally there was a preference towards MySQL, as times goes by suggestions to use it are becoming more and more rare. Having never done Rails with MySQL, I always preferred PostgresSQL. Reasons have to do with better documentation, easier database management, more features and standard compliant SQL, with assurance that software from that company whose name starts with “O” and ends with “racle” is not anywhere in your system.
With the “libpq-dev” installed in the 6th step, the database server needs to be installed with the user configured on application’s production configuration file.
Let’s install the database and the corresponding contrib package with:
sudo apt-get -y install postgresql postgresql-contrib
Posgres ships with secure defaults, this makes the first time with it a little bit difficult but it gives you assurance that you have nothing exposed to the Internet or anything else that has happened historically to MySQL and recently MongoDB users.
Three things are needed to continue: name of the production’s user, the name of the database, and the password. The first two should be in the last lines of “config/database.yml”, which looks like this:
production:
  <<: *default
  database: yourapplication_production
  username: yourapplication
  password: <%= ENV['YOURAPPLICATION_DATABASE_PASSWORD'] %>
Password will be installed in the environment, in case you follow the steps in sequentially, it is not there yet, so decide a password and write it down or somewhere to copy-paste it later. Should I suggest something in the lines of xkcd-password?: https://gitlab.com/dimitrios/xkcd_passgen (self promotion)
For what we are going to do production section in database.yml should have a “host: localhost” entry. This is because the application will connect to the database through a Unix socket, not through TCP, so in case “config/database.yml” is as above, make sure that the last lines are like this (Also on gist: https://gist.github.com/dimitrismistriotis/2aebe16bf713c40aaf98cee6fc8d4fa6#file-install-passenger-sh):
production:
  <<: *default
  database: yourapplication_production
  username: yourapplication
  host: localhost # <-- Check that this is there
  password: <%= ENV['YOURAPPLICATION_DATABASE_PASSWORD'] %>
Since the database runs as a separate user, we’ll sudo as this user and create the “yourapplication” user with ownership to “yourapplication_production” database who authenticates with “YOURAPPLICATION_DATABASE_PASSWORD”.
Get to the Postgres prompt by sudo -u postgres psql. In the docker instance
the database service had not started, so either do a
sudo service postgresql start or use the “start_services” script from step 5.
Once connected:
create user yourapplication with password 'YOURAPPLICATION_DATABASE_PASSWORD';
-- Responds with: CREATE ROLE
create database yourapplication_production owner yourapplication;
-- Responds with: CREATE DATABASE
-- Now exit with \q or with CTRL+d
\q
Verify that you can connect:
psql --username=yourapplication --host=localhost yourapplication_production
Which will trigger a password prompt, then “\q” or CTRL+d out of it.
An integration test could take place here by trying to connect from the Rails
application, so from the directory where it is): RAILS_ENV=production rails c
and then User.all (or a model that should be stored in the database). It
should fail because the password is not supplied anywhere: “PG::ConnectionBad:
fe_sendauth: no password supplied” is a possible error message.
For this the rbenv-vars, “a plugin for rbenv that lets you set global and project-specific environment variables before spawning Ruby processes.” will be used:
cd ~
git clone https://github.com/rbenv/rbenv-vars.git \
  $(rbenv root)/plugins/rbenv-vars
The place to store the password is the “~/.rbenv-vars” file, so edit it (
pico ~/.rbenv-vars, nano ~/.rbenv-vars, vim ~/.rbenv-vars) and
add the following line:
YOURAPPLICATION_DATABASE_PASSWORD=WHAT_YOU_PROVIDED_AS_PASSWORD
Now you can run a RAILS_ENV=production rails db:migrate (I logged out and then
back in, just in case there was an initialisation phase), which should run
without errors or at least connecting to the database. This file should be the
equivalent of Heroku environment variables and should be where all “secret”
stuff should be stored. For the discussion of how to store and maintain this
file, one possible way would be John Resig’s “Keeping Passwords in Source
Control” (you
might know him as the author of jQuery - reminder to self: buy 2nd
version of his “Secrets of the JavaScript Ninja” book and read it).
8. Install and configure Phusion Passenger for your application/environment
![]()
Passenger for dummies
Reference to post on Stack Overflow, “Phusion Passenger (for Dummies!)” where user user Tadman gives an answer to the question “I’m an experienced LAMP developer moving into Rails. I have a very stupid question to ask: what the hell does Phusion Passenger do?”
Passenger is a system for preparing and launching instances of Ruby for use with Rack-based applications such as Ruby on Rails. Apache and nginx, the two supported web server platforms, cannot run Ruby like they can PHP, Perl, or Python because there’s no built-in Ruby module that works as well as those do. This means Ruby tends to run as an independent group of processes that the web server will have to direct traffic through.
Rails tends to run as a persistent process because the start-up time for the whole stack is significant. Passenger launches new instances as they are required, and will kill off those that are no longer required. …
One feature of Passenger is it will re-use a portion of the Rails stack so that creating additional processes is faster, cloning one instance instead of spinning up a new one from scratch. The loader is written in C++ and handles properly configuring and kicking off each Ruby process as efficiently as possible and also helps save memory by sharing it amongst different processes. …
Passenger isn’t exactly revolutionary, but it does incorporate a number of essential features in a very convenient package. What makes it such a great thing is that it works very well and doesn’t demand a lot of attention. Out of the box it’s pretty much ready to go.
Part 1
Passenger’s homepage has a number of tutorials for different platforms since it can be used for different environments. Since we are in the Ruby on Xenial (Ubuntu 16.04) at the end the suggested link was this: https://www.phusionpassenger.com/library/walkthroughs/deploy/ruby/ownserver/nginx/oss/xenial/install_passenger.html, suggesting the following for installing Passenger (gist: https://gist.github.com/dimitrismistriotis/2aebe16bf713c40aaf98cee6fc8d4fa6#file-install-passenger-sh):
sudo apt-key adv --keyserver hkp://keyserver.ubuntu.com:80 --recv-keys 561F9B9CAC40B2F7
sudo apt-get install -y apt-transport-https ca-certificates


sudo sh -c 'echo deb https://oss-binaries.phusionpassenger.com/apt/passenger xenial main > /etc/apt/sources.list.d/passenger.list'
sudo apt-get update


sudo apt-get install -y nginx-extras passenger
Then edit “/etc/nginx/nginx.conf” as root (with nano for example:
sudo nano /etc/nginx/nginx.conf). There uncomment the line
“ # include /etc/nginx/passenger.conf;”
The line at the end should look like this:
include /etc/nginx/passenger.conf;
Then Nginx needs to restart: sudo service nginx restart. Check the
installation with sudo /usr/bin/passenger-config validate-install and then
sudo /usr/sbin/passenger-memory-stats.
Up to this point the commands in this section are a copy-paste from Passenger’s tutorial. The last two for checking the installation are usually not present in most posts that I have seen around. This is where the first part of the tutorial ends. We have assured that Nginx is configured with Passenger’s open source version as well as that the installation is correct, what is missing is the configuration for the specific application that we have deployed and want to execute. Instructions for this are in the second page of Passenger’s tutorial, Deploying a Ruby app on a Linux/Unix production server.
Part 2
Let’s find out which ruby will be used: passenger-config about ruby-command
and copy the result to use in a bit. Because of rbenv, it should be something
like: “/home/vagrant/.rbenv/versions/2.3.1/bin/ruby” (on the vagrant-docker
setup, if we want to write it in a more generic way, something like
“/home/name_of_user/.rbenv/versions/2.X.Y/bin/ruby”). This setting has an issue
with the environment variables in the “~/rbenv-vars” file as it cannot retrieve
them. Solution to this is to provide the location of that Ruby’s shim instead as
discussed here: https://github.com/rbenv/rbenv-vars/issues/32.
Next step would be to write site’s configuration. Passenger’s tutorial suggests
to write directly to “/etc/nginx/sites-enabled”, while a site should have its
configuration to “/etc/nginx/sites-available” with a link to the “…enabled”
directory. To accomplish this edit “/etc/nginx/sites-available/yourapplication”
(as sudo, so for example:
sudo nano /etc/nginx/sites-available/yourapplication with the following
contents (Gist: https://gist.github.com/dimitrismistriotis/2aebe16bf713c40aaf98cee6fc8d4fa6#file-sites-available-yourapplication):
server {
    listen 80;
    server_name 127.0.0.1;

    # Tell Nginx and Passenger where your app's 'public' directory is
    root /home/vagrant/web/public;

    # Turn on Passenger
    passenger_enabled on;
    # Use this if there are no environment variables:
    # passenger_ruby /home/vagrant/.rbenv/versions/2.3.1/bin/ruby;
    # Use this for environment variables:
    passenger_ruby /home/vagrant/.rbenv/shims/ruby;

    # From http://serverfault.com/questions/649971/nginx-deny-all-php-requests-except-index-php-for-security-reasons
    # Once site was live it received a big number of scans
    # for specific PHP locations.
    location ~ \.php$ {
        #access_log /path/to/log/nginx_deny.log name_log;
        deny all;
    }
}
I placed “127.0.0.1” as the server’s name because of the port exposed in docker and the fact that requests will only come from container’s host. In a public facing server here the name of the “www.” web server should be there. After deploying live there was a big number of scans towards the web server for specific PHP vulnerabilities or backdoor scripts. Hence the PHP blocking at Nginx level.
sudo ln -s /etc/nginx/sites-available/yourapplication /etc/nginx/sites-enabled/
sudo rm /etc/nginx/sites-enabled/default
An ls /etc/nginx/sites-enabled/ should show only one site, “yourapplication”.
Restart Nginx: sudo service nginx restart
You can connect to the application from the container through the exposed port which would be: http://localhost:4567/. For the GCE instance the address should be the one from the panel (as in the 5th step). An error will be displayed since up to now the secret key has not been configured.
It can be populated with the following command (be careful to use “»” so that the output or the echo command will be appended):
cd ~/web # Or the location of the application's folder
echo SECRET_KEY_BASE=`rails secret` >> ~/.rbenv-vars
Just in case I restarted the server sudo service nginx restart.
9. Connect to application from browser, see login page
This is a “wrap-up”, “checkpoint” step. Application should be available here: http://localhost:4567 and the login page for Devise should be available here: http://localhost:4567/users/sign_in. Again for the GCE instance the “localhost:4567” part should be substituted with the external facing IP. If something is wrong then check the instructions again and start debugging in the usual locations such as “/var/log/nginx” for Nginx’s logs, etc.
Screenshot of the login screen of the current application is as follows (styled with SBadmin2):
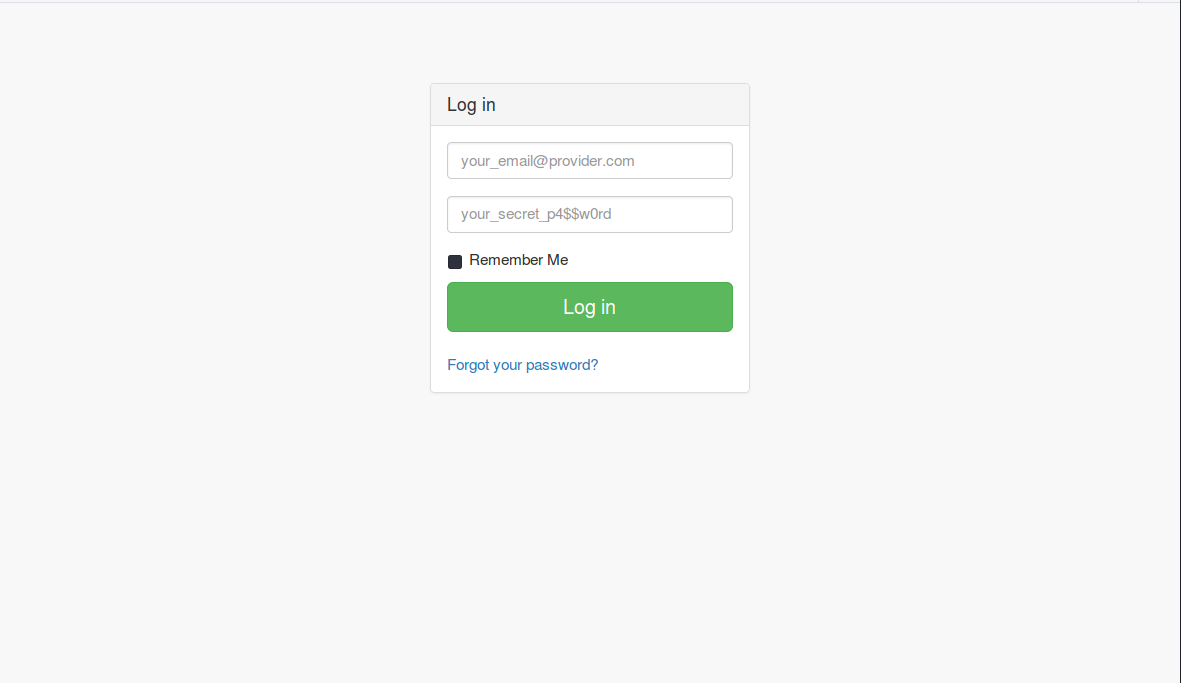
Once the IP based access has been verified the domain can be configured and this should be propagated to the Nginx’s configuration.
Final thoughts
Reflecting back on the time for writing this tutorial, I gave some time to contemplate on how much software is available for us in the open source world, how many companies have a version of their offering available to anyone, and generally how much material is available in the form of documentation, tutorials, or simple blog posts. We live in an era that we can stand on the shoulders of giants from where we can steal like artists…
While installing bundler the following message was displayed post-installation:
Bundler and RubyGems.org are free for anyone to use, but maintaining them costs more than $25,000 USD every month. Help us cover those costs so tha we can keep the gem ecosystem free for everyone: https://ruby.to/support-bundler Successfully installed bundler-1.14.3 1 gem installed
Please consider supporting this ecosystem any way you can. It can be a raising a bug, writing, blogging. Donate time on those projects or just some of your money if the individual circumstance allows. Sometimes “just” starring something on Github can make a person happy.
The main target of this post was to separate the steps into single units of work and have many checkpoints after each one of them. For most cases of the material I read before compiling this post is mixed between actions that would be part of development, source control management, purchasing as ever instance, etc.
Appendix
Deploy from Git repository
This could possibly have been embedded in to the 6th step above, since setting it up took about ten minutes. Decided to separate it from the main body as the steps should be mostly about the Rails application not where it is stored or how it is retrieved can be different among different source management providers that someone could use.
In this project’s case the project is hosted on Gitlab which utilises the concept of “deploy keys”:
Deploy keys allow read-only access to multiple projects with a single SSH key.
This ensures that if the keys which will reside in the virtual machine instance become compromised, they cannot be used to inject code. You can access this menu either from the project’s drop-down:

or from a link:
https://gitlab.com/<your_user_name/
Then deploy with the following, substituting “SSH-LOCATION-OF-PROJECT” with the actual location, answering yes to the fingerprint question:
$ git clone SSH-LOCATION-OF-PROJECT web
Cloning into 'web'...
The authenticity of host 'gitlab.com (104.210.2.228)' can't be established.
ECDSA key fingerprint is SHA256:HbW3g8zUjNSksFbqTiUWPWg2Bq1x8xdGUrliXFzSnUw.
Are you sure you want to continue connecting (yes/no)? yes
Enable SSL
Placeholder, to be implemented with Let’s Encrypt and Certbot.
Pros and Cons of Google Cloud
Judging only from this exercise, it is too early to say. Google Cloud has a whole ecosystem of tools, billing mechanisms, container swarm solutions, cloud storage and CDN, as well as proprietary solutions such as the BigQuery among others. I would treat the Google Compute Engine as the gateway drug to the ecosystem as you bring your Linux application there and from this as a starting point integrations with the cloud can start to take place.
So although the experience was good up to now, it is not sufficient for choosing this provider versus another one if the application remains as-is (a small Rails application).
Items for next version
Two main concepts which are up to now left out: Continuous Integration or remote deployments and deployment to an actual server instance.
For deploying:
- Capistrano or another deployment solution
- Scripting what need to be done server-side.
For the scripting part, I suppose that there needs to be: a bundle followed by
an rbenv rehash, then RAILS_ENV=production rais assets:precompile followed
by RAILS_ENV=production rais db:migrate and touch a_file_whose_name_I_forgot
so that Passenger will restart. I am not exactly sure that there is not
something missing, so better to have these in the TODO section for later.
There will also be the commands for actual deployment on an instance available on the Internet (purchased from Amazon/Digital Ocean/somewhere else). My advice is still to do a local deployment first so that the reader will understand what is going on without the stress of a live environment or by paying for a server that does nothing. Then re-do the same stuff with more confidence on the actual production server.
Other References
- Michele Anica’s How To Install Ruby on Rails with rbenv on Ubuntu 14.04
- How To Deploy a Rails App with Passenger and Nginx on Ubuntu 14.04
- Perl warning Setting locale failed in Debian
Please check my book

I am writing a book named “IT Archetypes” — a know thyself guide for the IT people, a know thy-friends guide for the ones that interact with them. Check it here: http://www.itarchetypes.com and sign up to the newsletter for updates on new chapters.